Website Development Tips

Building a Custom WooCommerce to Reach360 Integration with Zapier Webhooks

Building a Custom WooCommerce to Reach360 Integration with Zapier Webhooks

Overview

One of my recent projects involved integrating a WooCommerce store with Reach360, a learning management system (LMS), to automatically enroll customers into training groups immediately after purchasing a course.

Although both platforms provide APIs, there was no native integration available. The objective was to create a reliable automation that connected the two systems while requiring little to no ongoing maintenance.

The Problem

The goal was that whenever a customer purchased a specific WooCommerce product, they should automatically be enrolled in the corresponding Reach360 learning group without requiring any manual work.

Because Reach360 doesn’t provide a direct WooCommerce integration, the workflow needed to bridge multiple platforms while ensuring customer information was transferred accurately.

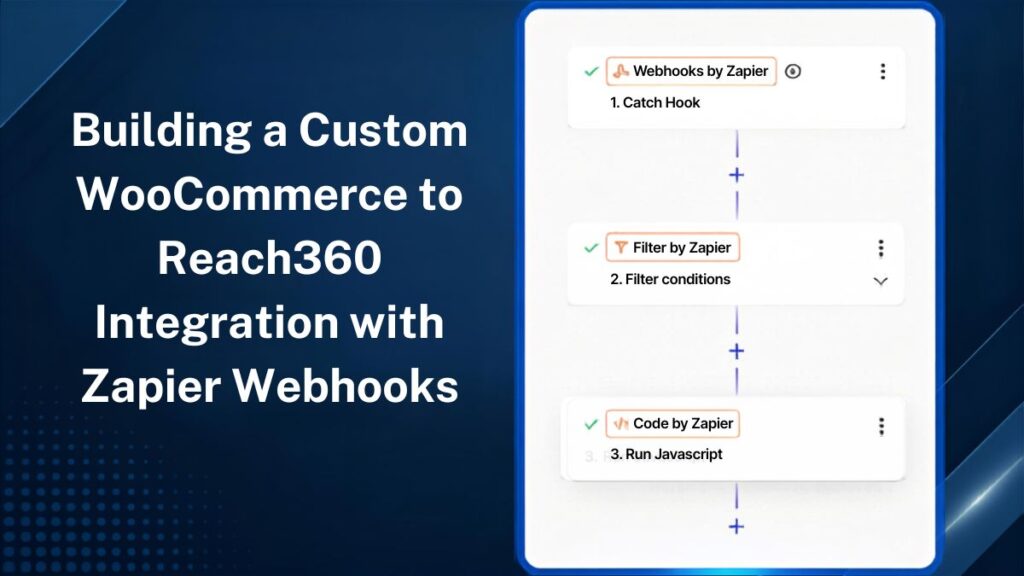
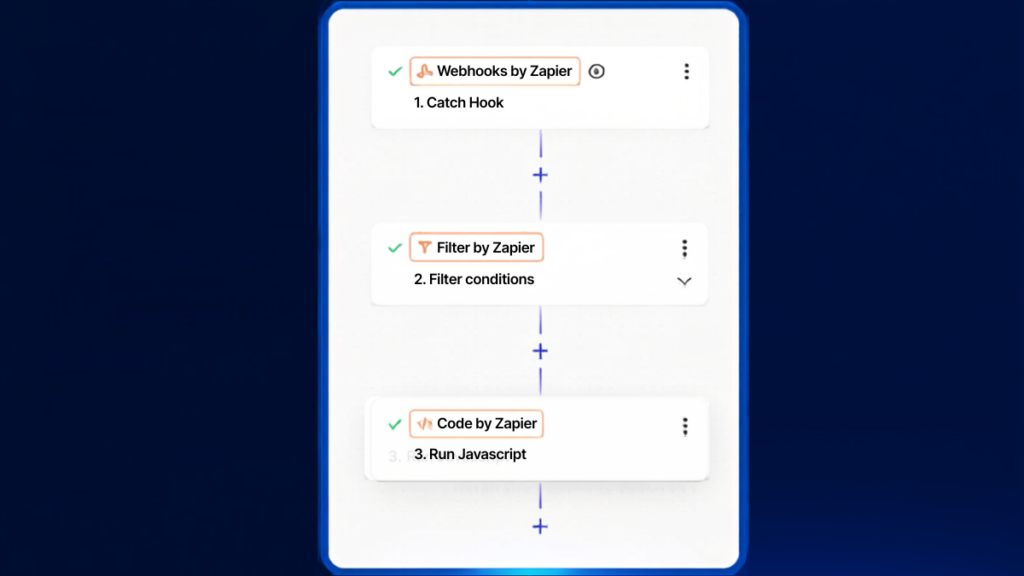
The integration was built using Zapier’s Webhooks feature as the middleware between WooCommerce and Reach360.

The workflow included:

  • Triggering a Zap from a WooCommerce webhook whenever a qualifying order was completed.
  • Parsing the webhook payload to extract customer information such as name, email address, purchased products, and custom metadata.
  • Filtering orders to determine which Reach360 group the customer should be added to.
  • Authenticating with the Reach360 API.
  • Sending a custom API request to automatically enroll the customer in the correct learning group.
  • Returning success and error responses for easier troubleshooting.

The finished automation eliminated the need for manual user enrollment and ensured customers received immediate access to their purchased training content.

Beyond saving administrative time, the integration also reduced the possibility of human error and created a much smoother customer experience.

Parsing the WooCommerce Webhook

One challenge was that the webhook payload contained a large amount of nested JSON. While WooCommerce exposes standard customer information, this project also relied on custom metadata added to the order. Instead of manually traversing arrays throughout the Zap, I wrote a JavaScript step in Zapier to normalize the payload into a much simpler structure.

The script converted the meta_data array into a key/value object, extracted the custom learner information, collected the purchased product IDs, and returned only the values needed by the remaining Zap steps.

// Parse the incoming JSON string
const order = JSON.parse(inputData.webhook_JSON);

// Convert meta_data array into key/value object
const meta = Object.fromEntries(
  (order.meta_data || []).map(item => [item.key, item.value])
);

// Extract the three values
const email = meta["_product_user_email"] || "";
const firstName = meta["_product_user_first_name"] || "";
const lastName = meta["_product_user_last_name"] || "";

// Extract line item PRODUCT IDs
const productIds = (order.line_items || []).map(item => item.product_id);

// Return everything
return {
  product_user_email: email,
  product_user_first_name: firstName,
  product_user_last_name: lastName,
  line_item_product_ids: productIds
};

This approach made the rest of the automation significantly cleaner. Instead of repeatedly navigating nested JSON paths, every subsequent Zap step could reference simple output variables.

The result was a workflow that was easier to read, debug, and extend as additional courses and product mappings were added.

Calling the Reach360 REST API

Once the webhook data had been normalized and the purchased product mapped to the appropriate Reach360 learning group, Zapier issued an authenticated HTTP request to the Reach360 REST API to enroll the learner.

A simplified request looked like this:

POST /users/{userId}/groups
Authorization: Bearer YOUR_ACCESS_TOKEN
Content-Type: application/json
{
  "groupId": "12345"
}

Zapier’s Webhooks by Zapier action handled the authentication, headers, and JSON body, allowing the entire enrollment process to complete within seconds of a WooCommerce purchase.

The integration also validated the API response before continuing so failed enrollments could be identified immediately rather than silently ignored.

For developers interested in building similar integrations, the Reach360 REST API documentation provides endpoint references, authentication details, and example requests:

Example API Requests: REACH API Example Calls

These resources include sample requests, authentication methods, and response formats that were useful when validating the integration.

Projects like this demonstrate how flexible automation platforms such as Zapier can become when paired with custom webhooks and APIs. Even when two platforms don’t offer an official integration, it’s often possible to build a reliable connection using webhook events, data transformation, and API requests.

In Conclusion

This project was a great example of solving a real-world business problem by combining WordPress, WooCommerce, Zapier, REST APIs, and custom webhook automation into a seamless workflow.

Building a Custom WooCommerce to Reach360 Integration with Zapier Webhooks Read More »

How to Align Icons to the Top of the Elementor’ s Icon List Widget

How to Align Icons to the Top of the Elementor’ s Icon List Widget

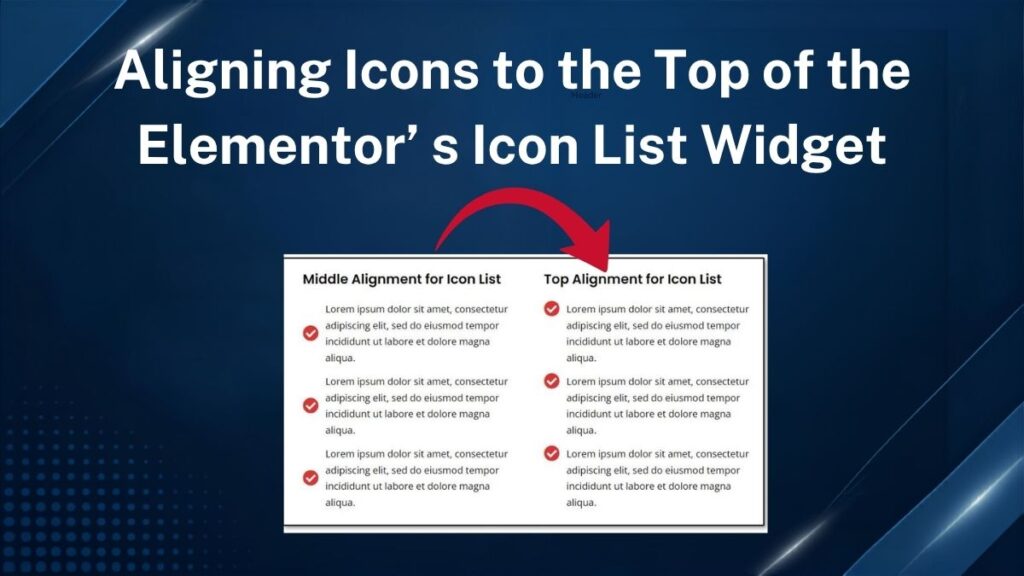
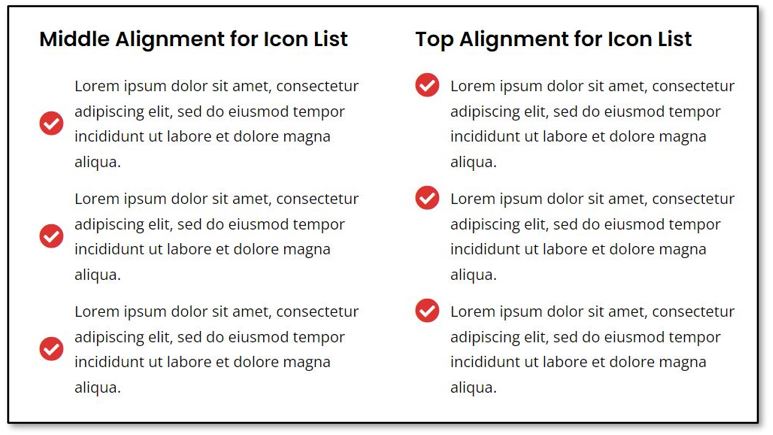
Elementor’ s icon list widget works well for quickly building a custom icon list with a unique look and feel. The styling choices in the Elementor settings panel give flexibility in the styling the icon’s color and size, the look of the font text and the desired spacing between the icon and text. However, the default alignment for the icon in regards to the text sometimes needs custom CSS adjustment. If the text for an individual icon list item is long enough to wrap to second or multiple lines, the icon is aligned to the vertical middle of the text. Often a better alignment look is to have the icon aligned to the top of the text. The picture below shows the issue. Moving the icon to the top of the icon content (right hand side of picture) is a more visually appealing look.


Middle alignment vs Top alignment for Elementor Icon List Widget

There are 2 approaches given for a custom CSS fix. The first one is for use when you only want to affect a particular instance of the icon list widget. The second approach given works as a site wide fix. It will impact the site globally.

How to align Elementor list icon to the top for one particular instance of the Icon List Widget

To impact a particular instance of an Elementor icon list widget, the easiest approach is to add a CSS Class attribute to the element and add then add custom CSS for this particular class selector that you created.

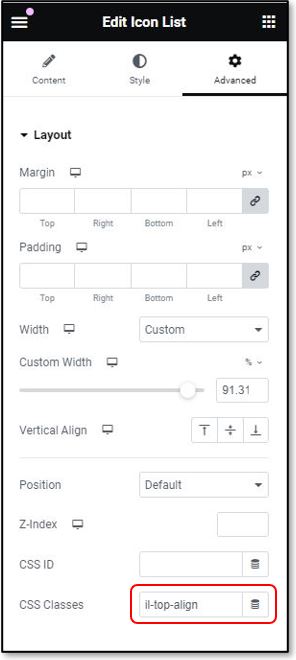
To add a custom class attribute, open the page in Elementor. Select the Icon List Widget that you would like to align the icons to the top. On the panel for editing the attributes go to the Advanced tab. Add “il-top-align” to the CSS Classes box (without the parenthesis.) See figure below for the location of CSS Classes box.

Creating a custom CSS class for the Elementor list icon widget

The next step is to add some custom CSS for the “il-top-align” class selector. To do this go to Appearance > Customize > Additional CSS. Paste the CSS code below and hit “Publish”.

.li-top-align .elementor-icon-list-item {
	align-items: flex-start!important; 
}

How to align Elementor list icon to the top for a global effect

To get a universal change to all Elementor list icon widgets across your site, add custom CSS for the compound Elementor list icon selector. It is composed of 3 classes. This CSS will affect all instances of the Elementor list icon widget across the site.

To do this add this CSS to the your additional CSS area by going to Appearance > Customize > Additional CSS. Once you paste the code in hit “Publish”.

.elementor-widget .elementor-icon-list-item, .elementor-widget .elementor-icon-list-item a 
{
	align-items: flex-start!important; 
}
.elementor-icon-list-icon {
    margin-top: 5px;
}

The last 3 lines provided dealing with top margin, help with more precise alignment.

If this CSS code for the compound selector is puzzling, take time to learn how compound CSS selectors work by reading my post CSS: The 5 Minute Overview . Compound selectors are truly the workhorses of CSS as they are patterns used to select exactly the element you want to style. Hence, compound selectors allow you to get the look you need in very particular places of a web page especially when used inside <div> tags.  To get a more complete feel for all the selector types possible, go to W3Schools overview of selector types.

Elementor and Custom CSS Classes

Learning how to use the CSS Classes box in Elementor is a great way to get additional control over the elements used on your Elementor pages. By adding custom code, you can achieve any desired look and feel. For more information on using Custom CSS in Elementor, see this resource article by Elementor. It really is easy to learn how to add Custom CSS at the site level, at the page level and at the element level.

How to Align Icons to the Top of the Elementor’ s Icon List Widget Read More »